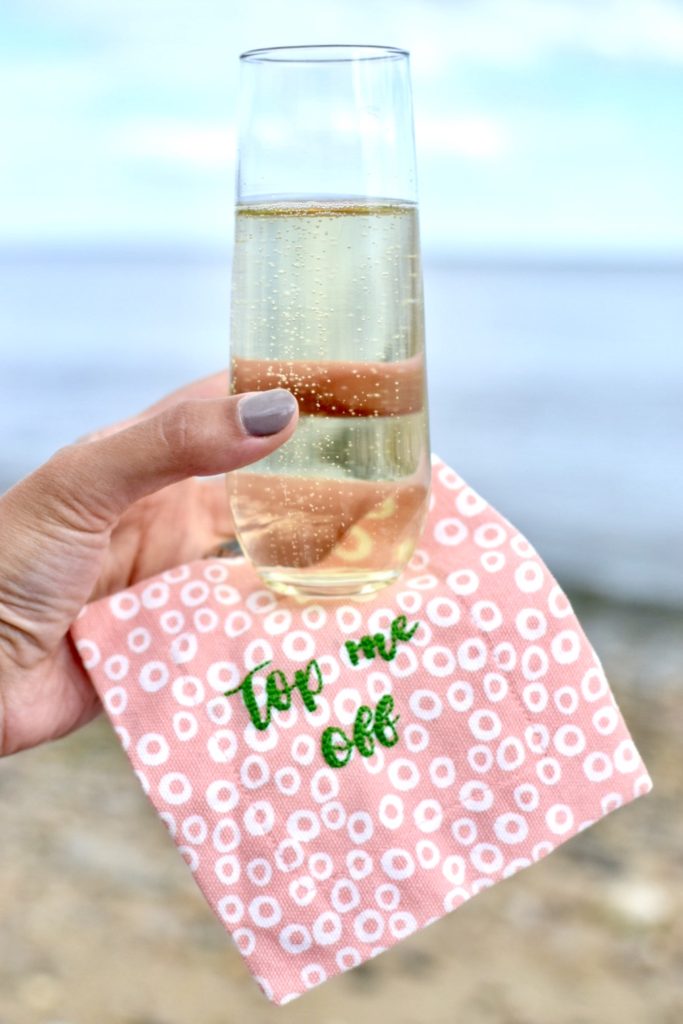

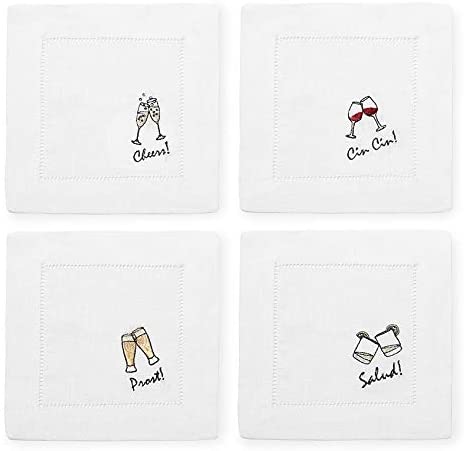
Paper, cloth, solid, patterned or embroidered cocktail napkins are a must-have for any bar set up when entertaining and embroidered cocktail napkins have that something extra. They are mainly served with your drink to keep your hand dry from condensation. If you are setting your drink down it can also be used as a coaster. They are typically about a 5″ square or can be rectangle around 5×9″ but the sizes do vary a bit. Although there are tons of fun printed paper cocktail napkins which are also useful for serving apps, I love that cotton or linen cocktail napkins are reusable and generally nicer. They also make lovely hostess gifts!
When purchasing fabric cocktail napkins you will often see them with embroidery. If you have some sewing skills you can make your own embroidered cocktail napkins. I’ll show you how I not only embroider my cocktail napkins but if you have a sewing machine they are pretty easy to make. Making them yourself gives you the option to cover the back of the embroidery but you can also buy plain cocktail napkins and jazz them up with whatever you want. Just keep in mind you want your back to be tidy as well when your embroidering.
How to Make Embroidered Cocktail Napkins
Materials
- Cotton or linen Fabric (prewashed) cut into an 8″ square and 4.5″ square, this will create a 5″ square cocktail napkin if sewing your own OR plain premade cocktail napkins to embroider
- Embroidery Needle
- Embroidery Floss
- Embroidery Hoop
- Thread that matches your fabric
- Transfer Materials Depending on Method Chosen
- Sewing Machine (If sewing your own)
Embroidery Design
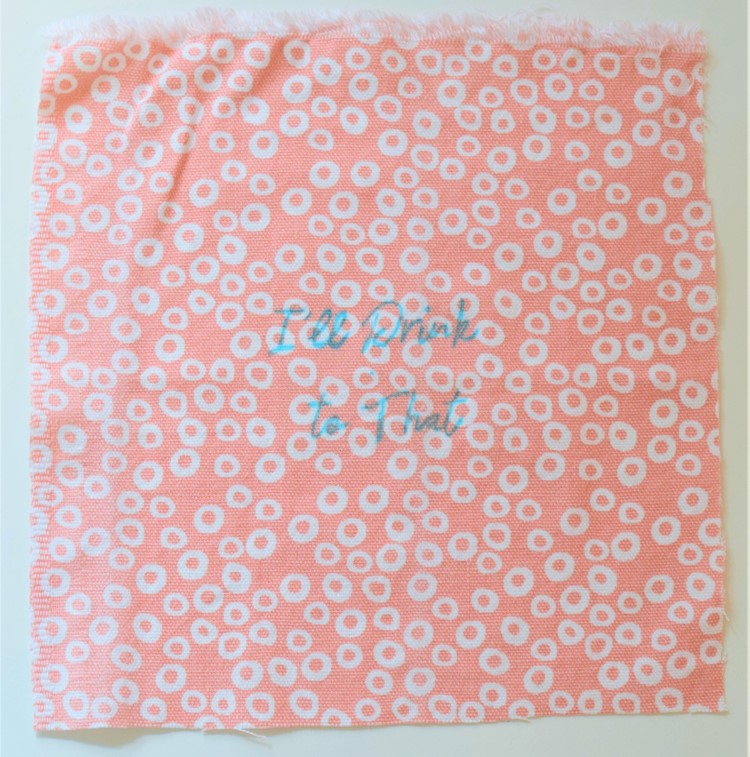
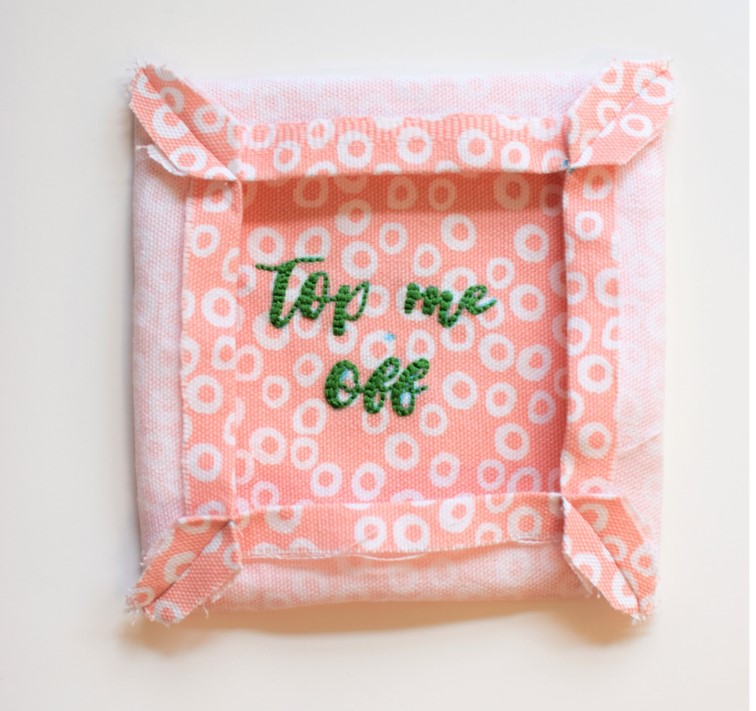
Some embroidered cocktail napkins are monogrammed, some have embroidered images or fun shapes, and I’ve seen some with fun cocktail related saying. You can draw your own images or type out sayings and monograms from your computer. Keep in mind that whatever you would like to embroider on your napkin should be relatively simple and not exceed about 2.5″ since the overall center of the napkin after sewing is 3″. You will be doing your embroidery on the larger 8″ fabric square.


Transferring Your Design
Tracing with Light and Water Soluble Marker
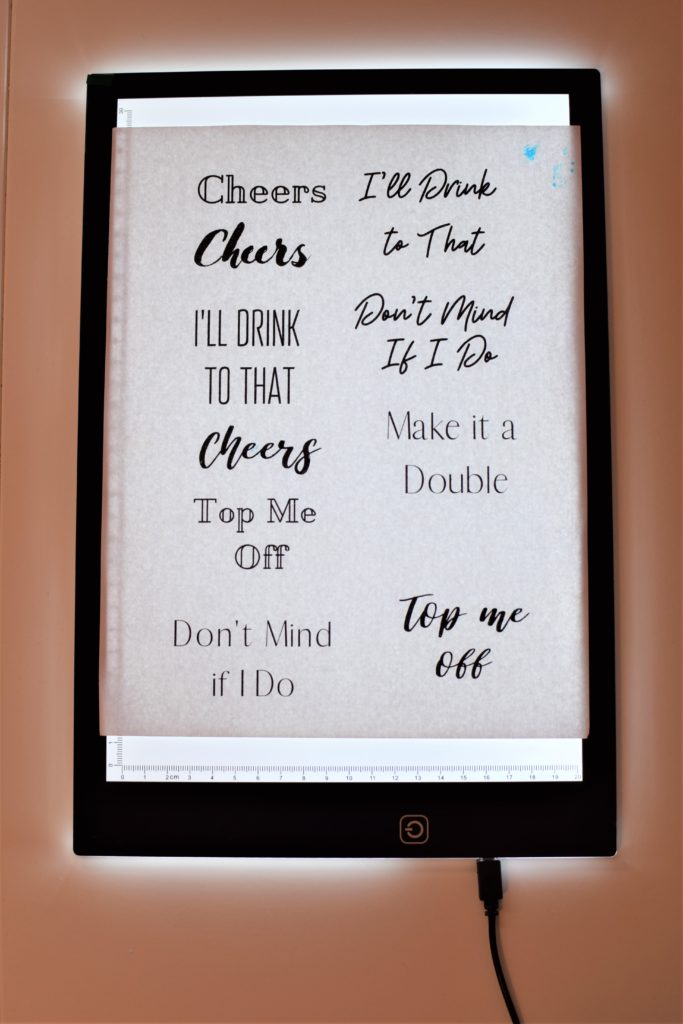
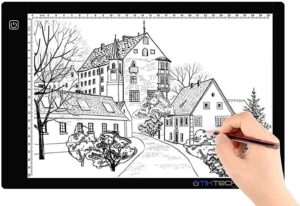

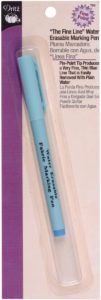

The way I most often transfer an embroidery design is using an expensive light pad and water-soluble pen or chalk. These light pads are pretty inexpensive and are great for all tracing needs. Here is the one that I have. You can also use a window on a sunny day. I then trace the design with a water-soluble marker. I have been using this Dritz one. Keep in mind this method will be hard to do on really dark and thicker fabrics. You could also use a water-soluble marker to freehand draw designs.
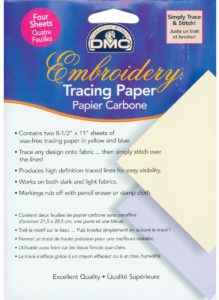
You can use pattern tracing paper which many come with light and dark colors making this a good option with all fabrics. You simply sandwich this paper between your design and fabric, then trace your design it will transfer the pattern.
Embroidery Tracing Paper
Printable Transfer Sheets
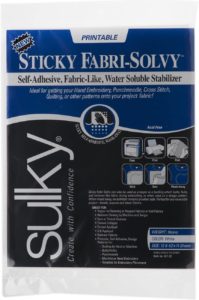
There are sheets your can print your design with your printer. Some you can print the design and iron it on to transfer. There is also something called Fabri-Solvy that allows you to print your design onto the sheets then stick it to your fabric and embroider over it. Later it dissolves away with water leaving your stitching.

Embroidering Your Design
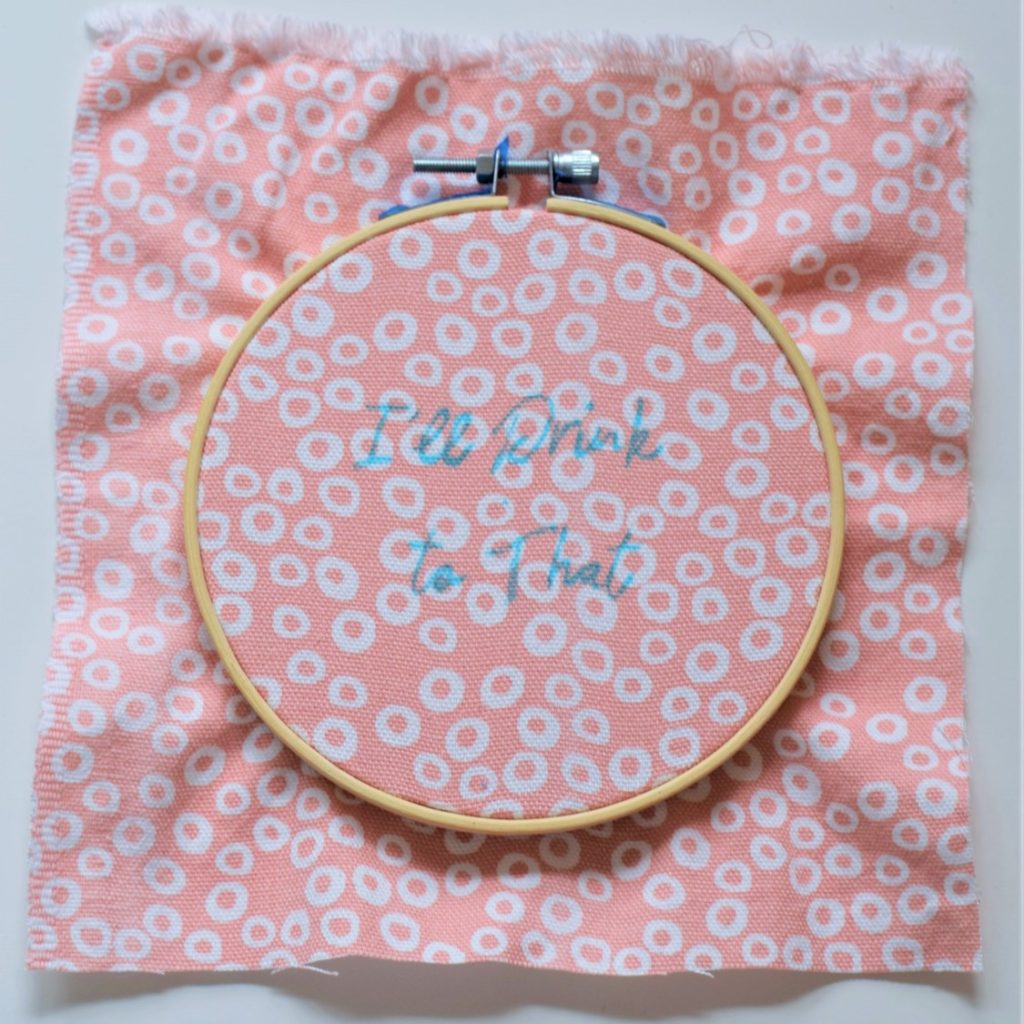
There are a ton of stitches you can use to embroider your design. Depending on which design you chose will help dictate the stitch you use. Since here I’m making thin-lined text I kept it simple using a backstitch. If your really new to embroidery here is a video for beginners as well as a video with how to create basic embroidery stitches by handiworks.
Sewing Your Cocktail Napkin

Iron 1/2″ hem around the edges then fold again and iron another inch.
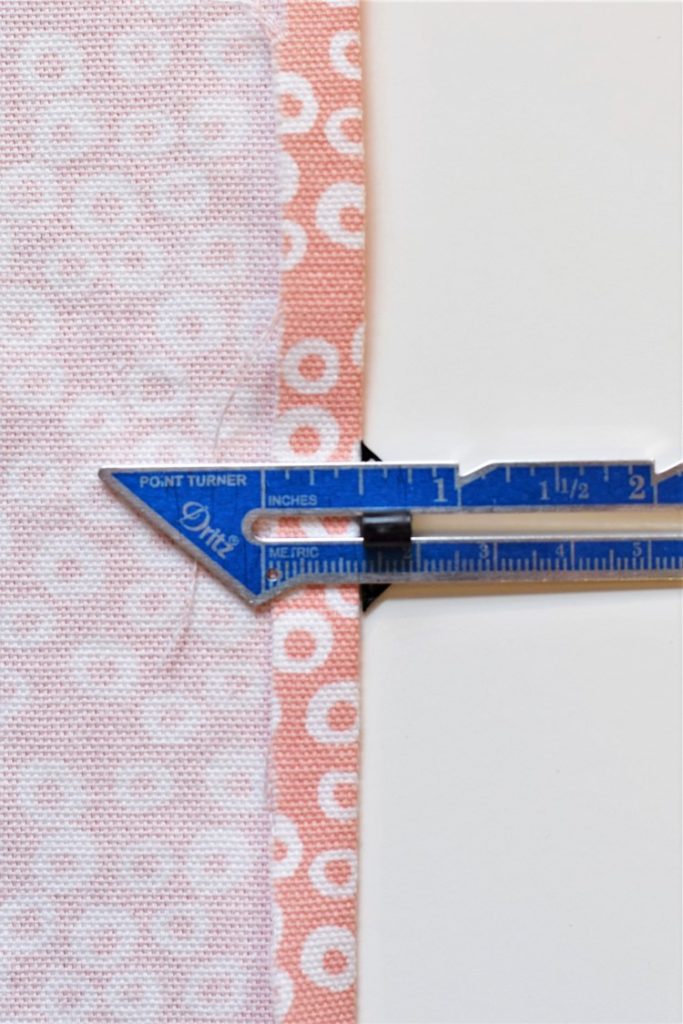
To create mitered corners, measure from the end of the 1/2″ folded corner 2″ and mark on each side of the corner. Then draw a line connecting each mark. This is your sewing line and should cross the intersection of your 1″ mark. Fold with the right side in, lining up the 2″ marks on each side. Mark all four corners.
Folding the right side in (the side with your embroidery and want to show) and sew all four corners along the marked line.
Trim the extra fabric, notching at the folded end. Iron the seam open flat and flip right side out. Make sure your points have been pushed out and crisp and press again.
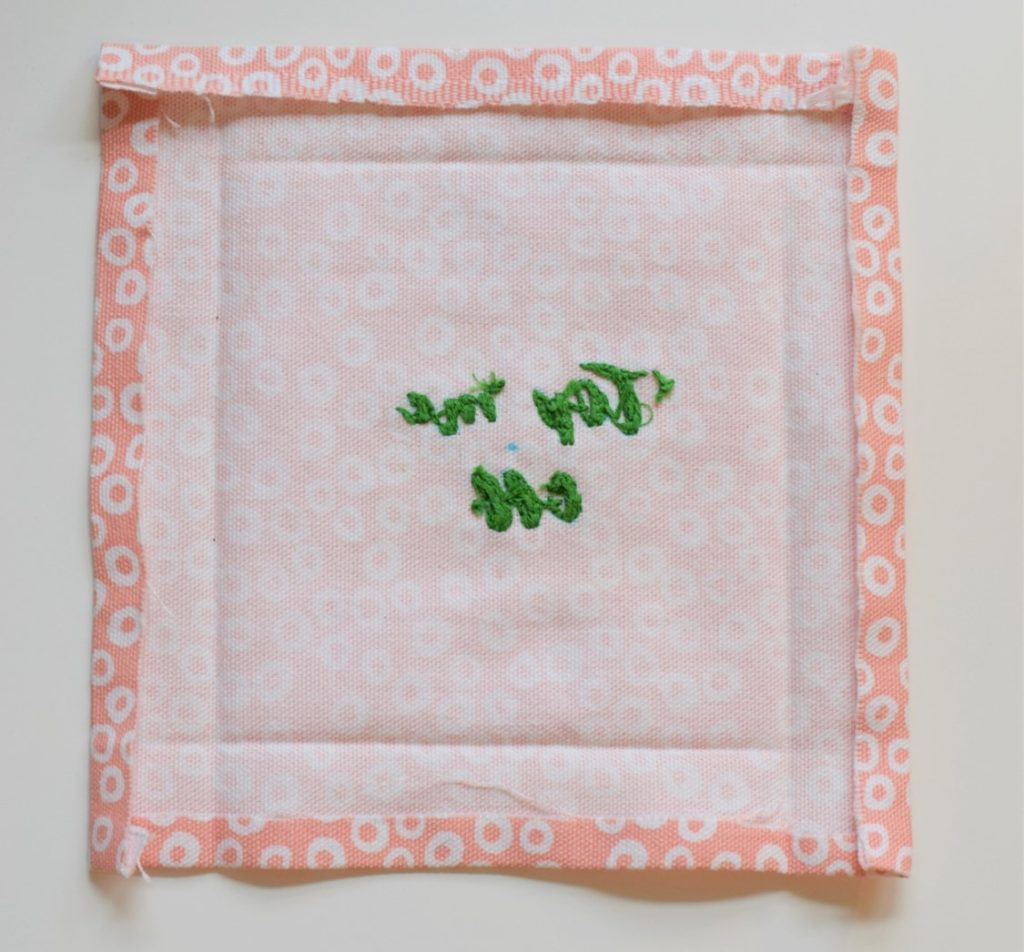
Take your 4.5″ second square and center it in the back to cover the back of the embroidery. Make sure its tucked in under the hem and centered so it lays flat and pin in place if needed.
Topstitch close to the hem with your machine starting each line at the corner seam. Stitch all the way around to finish the napkin.
Now enjoy your cocktail napkins with a refreshing drink or share them as gifts with friends!
-Ashley


2 comments
I LOVE mine that you made! You’re so talented!
Thank you Stacie! I’m so glad that you love them!! 💕😄